Before you begin, you need to know your email address and your password. If you don’t know your password, stop now and find it first.
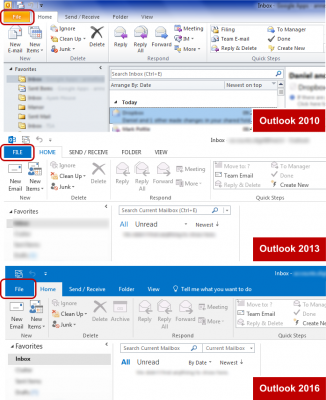
- Open Outlook and have your Inbox open. Click the File button at the top left. The button is in the same place no matter if you use Outlook 2010, 2013 or 2016 – it’s just a different colour:
- Click the Accounts Settings button in the middle of the screen, and then click Account Settings from the pulldown menu which appears:

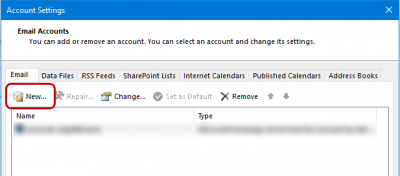
- Click the New button at the top left of the window you see now (this is the same screen across all versions of Outlook)
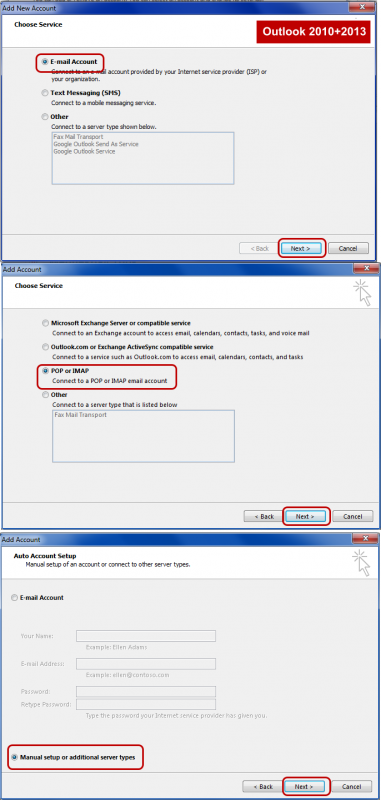
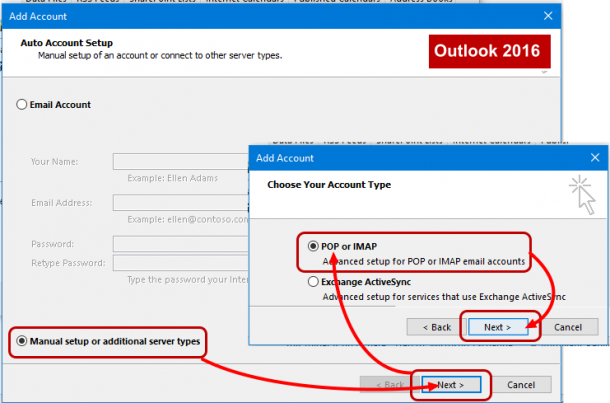
- The different versions of Outlook ask their questions in a different order at the next step, but you want to add a new email account, selecting the Manual setup option and POP or IMAP.
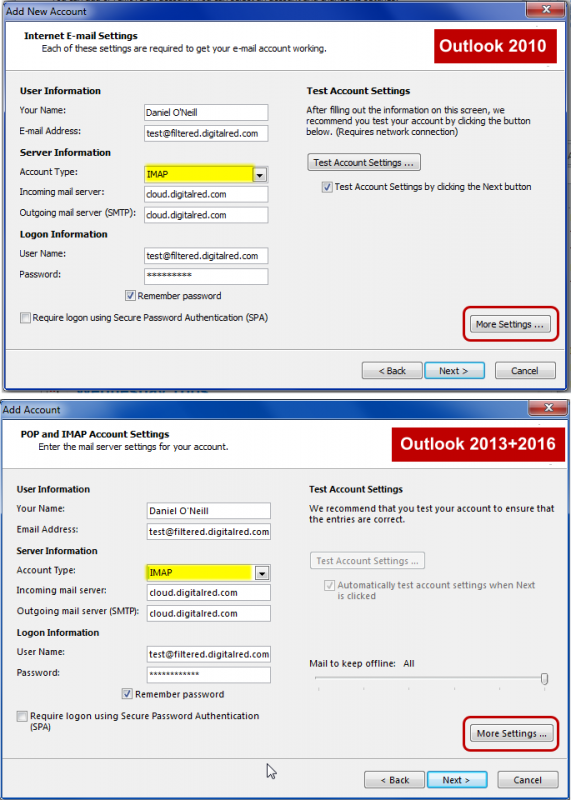
- Once you’ve selected the manual setup of a POP or IMAP account, the main configuration screen is the same for all versions of OutlookMake sure that you select IMAP from the pulldown menu (highlighted yellow in these screenshots)
- After you’ve clicked More Settings the screens are thankfully the same for all versions of Outlook again.
- Click the Outgoing Server tab and tick the top box (you can ignore the rest of that screen)
- Next click the Advanced tab and pull down both None menus and select SSL, and then change the 25 to 465.
- Make sure you do it all in that exact order.
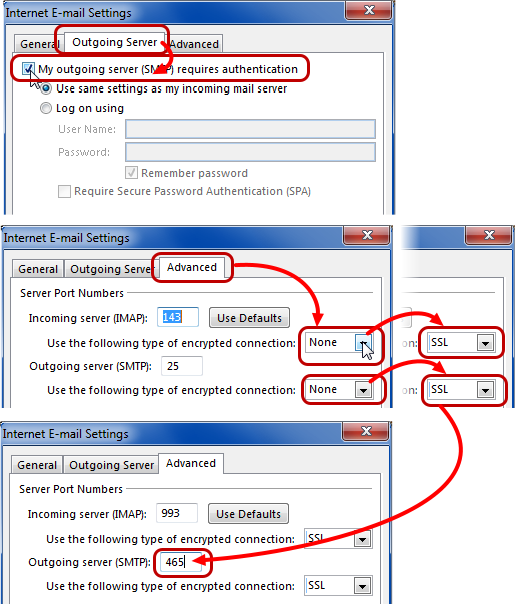
- Before you press OK, make sure that your screen looks like the third of these screenshots: you should have 993 in the top box, 465 in the bottom box, and SSL in both pulldown menus.
- This is where most people get stuck, and combined with the Outgoing Server tab’s box not being ticked, if you’re going to have a problem anywhere with your email setup, it’s going to be on one of these things. Check what you’ve got, then click OK
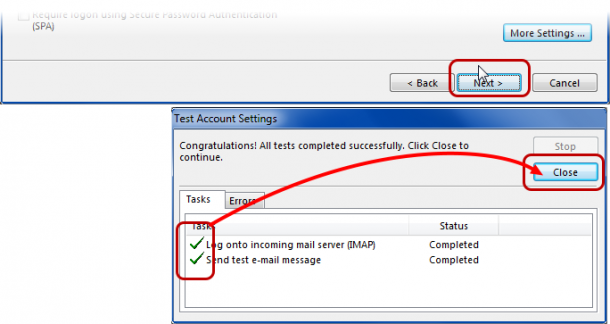
- Click OK from the box above, then Outlook will now do a test Send/Receive to make sure that you’ve entered the settings correctly. Assuming that you have done everything properly, you’ll have two nice green ticks like this:
- You’re done – enjoy your new email account.

