Before you begin, you need to know your email address and your password. If you don’t know your password, stop now and find it first.
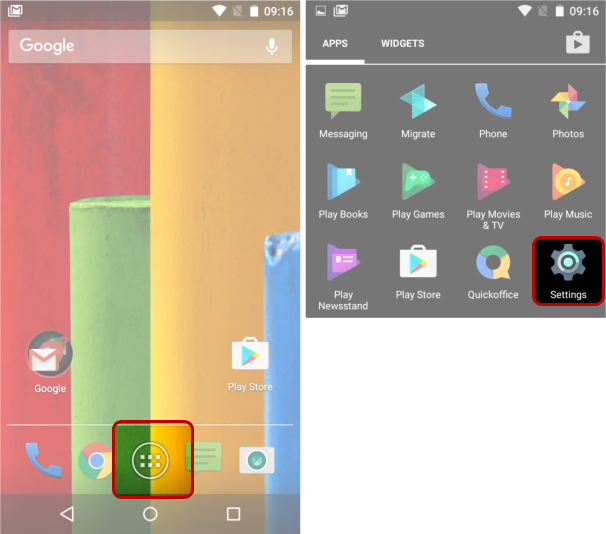
- Open the Settings app on your phone (probably a ‘cog’ icon – if you’re not sure where to find it, open the ‘app drawer’ first to see all the icons, and scroll through until you see Settings)
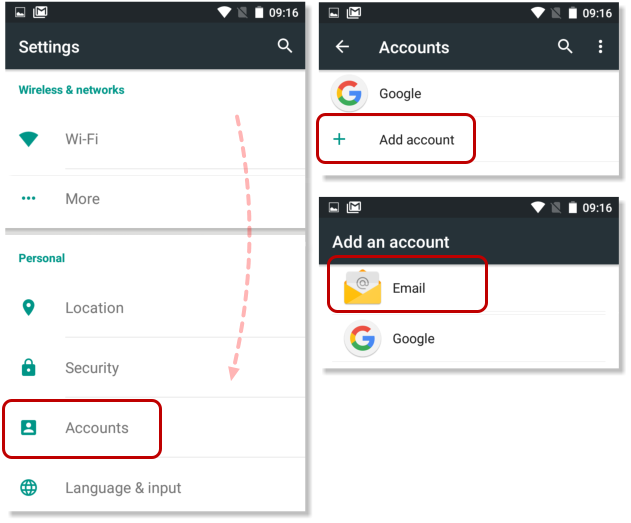
- Scroll down, probably towards the very bottom, and tap on Accounts
- Select Add account
- Select Email
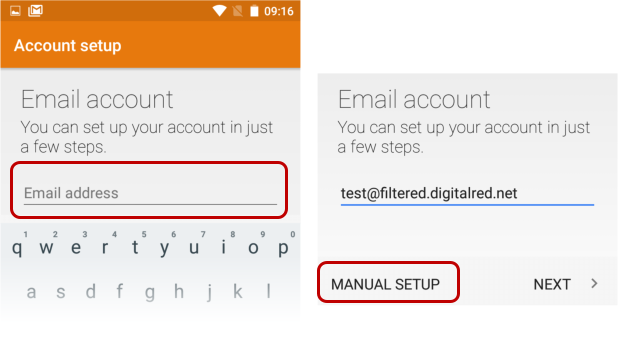
- Type in your email address, and then select Manual setup
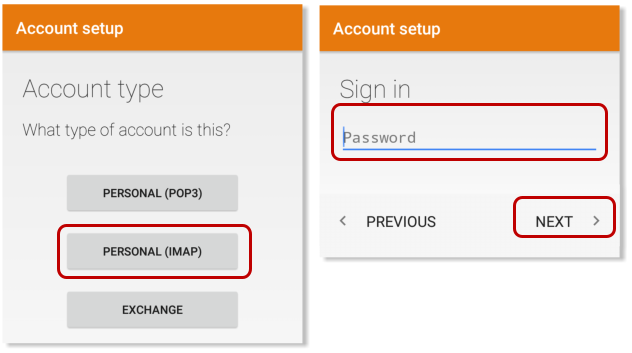
- Select IMAP from the list of account types, then enter your email account’s password, and tap Next
- There are two screenshots here, one for Incoming and the second for Outgoing mailservers.
- You’ll see the Incoming one first
- after you tap Next you’ll see the Outgoing one
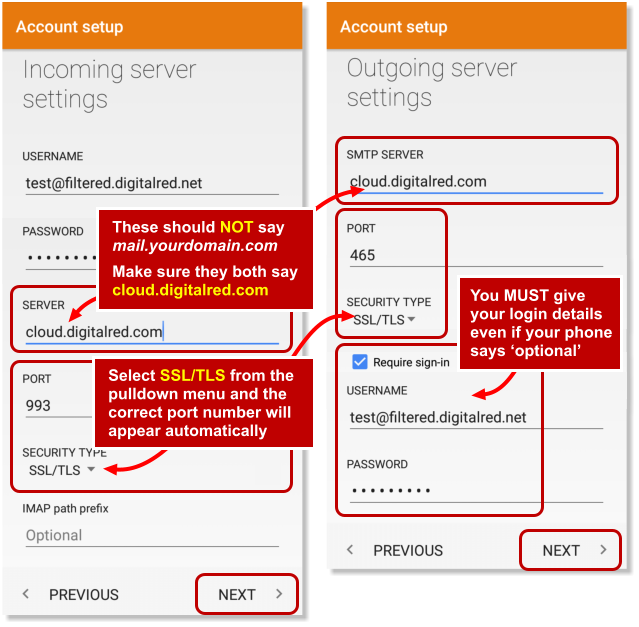
- They basically need the same details:
- Your username is your whole email address
- Your password (remember that it’s CaSe SeNsiTive!)
- The server names are both cloud.digitalred.com
- You need to select SSL/TLS from the pulldown menu
- (The port numbers should set themselves automatically: incoming is 993, outgoing is 465)
- The final two screens are for your personal preferences, but accepting the default details is fine:
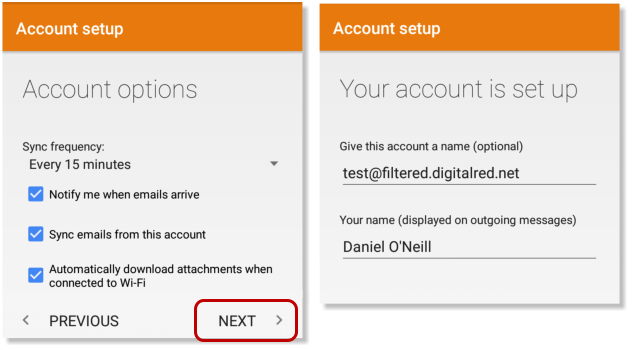
- Only you will see the Account name – that’s what this new email account will be labelled on your phone – nobody else sees what you enter here (so you might call it Work email)
- When you send an email to someone, how they see your name is determined by what you enter for Your name – so you don’t want to use all-lowercase letters there.
