
Back to Step 1 | Skip to Step 3
Step 2 – Updating WordPress
First, log into your WordPress dashboard at www.mysite.com/wp-admin as normal – obviously using your own domain name and not mysite.com. You’ll see your regular login screen – so log in as you normally do:
(Note: if your username is admin, we REALLY want to change that later on too. Your username should be something not obvious, and your password wants to be at least 10 characters long, including numbers, symbols and miXeD cAseS)
Once you’re logged in, we need to potentially do three lots of updates: WordPress, Plugins, and Themes.
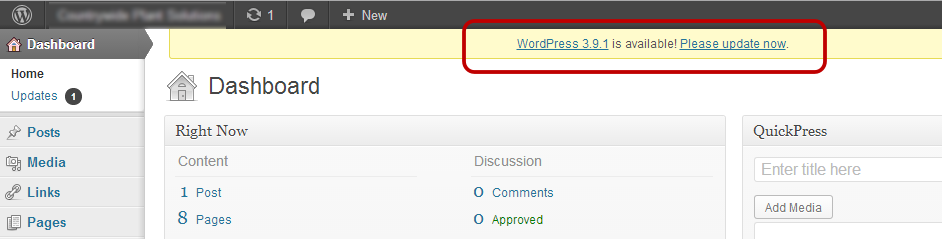
We’re going to check WordPress first: if there is an updated version of WordPress available, you’ll see a message along the top of your site saying “WordPress 3.9.1 is available! Please update now” (3.9.1 is the current version as of 25 July 2014 – you can check to see what the current version is now on the WordPress developers’ website)
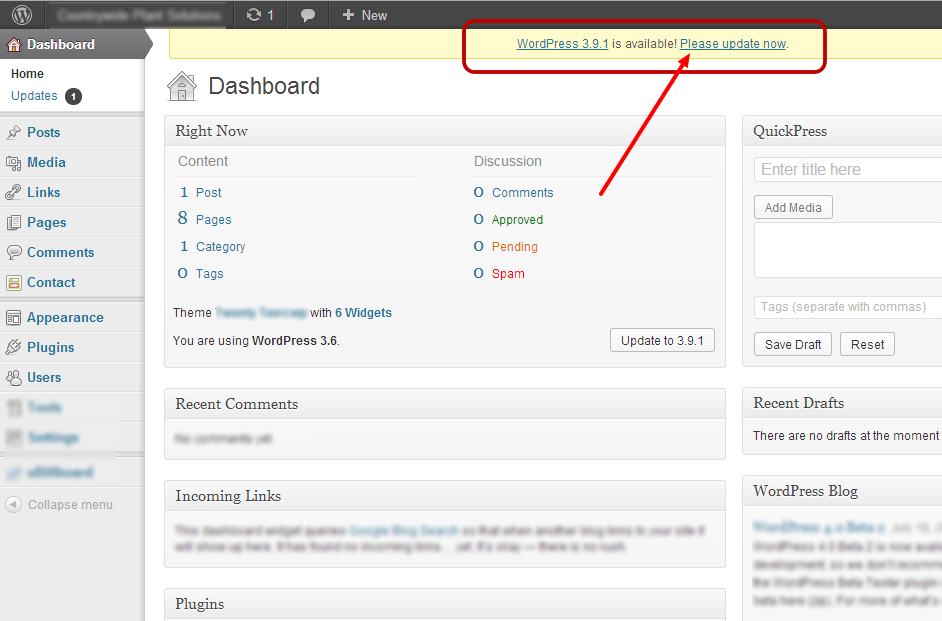
- If you see the message that you need to update WordPress to the new version, click the link “Please update now”


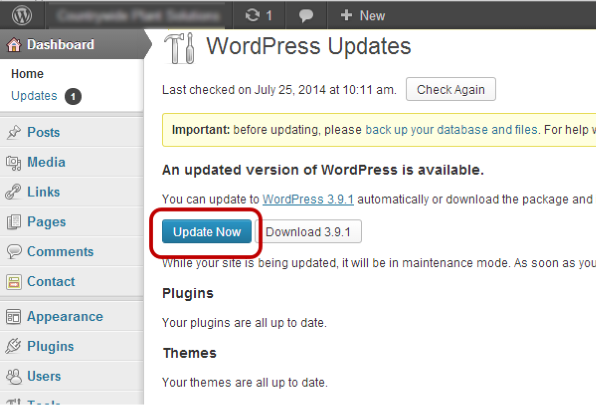
Next you’ll see the screen that reminds you that you need to take a backup (which we just did in Step 1) and then you’ll see the button which says Update Now – just click that and wait for it to complete – it usually takes about a minute.


Once your WordPress update is complete, carry on below - If you don’t see the message that you need to update WordPress give yourself a pat on the back, but don’t stop – we still have a long way to go yet.
Next we’re going to update the Plugins. Plugins usually get updated more often than WordPress, so you’re more likely to have a Plugin that needs to be updated. If you do, you’ll see a little number in the left hand menu next to the word Updates, like this:
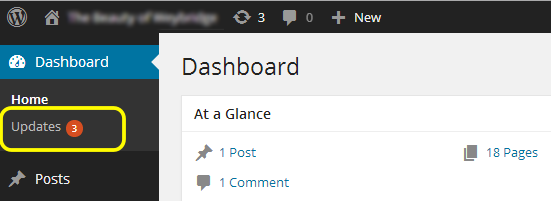
Click on the Updates link in the menu
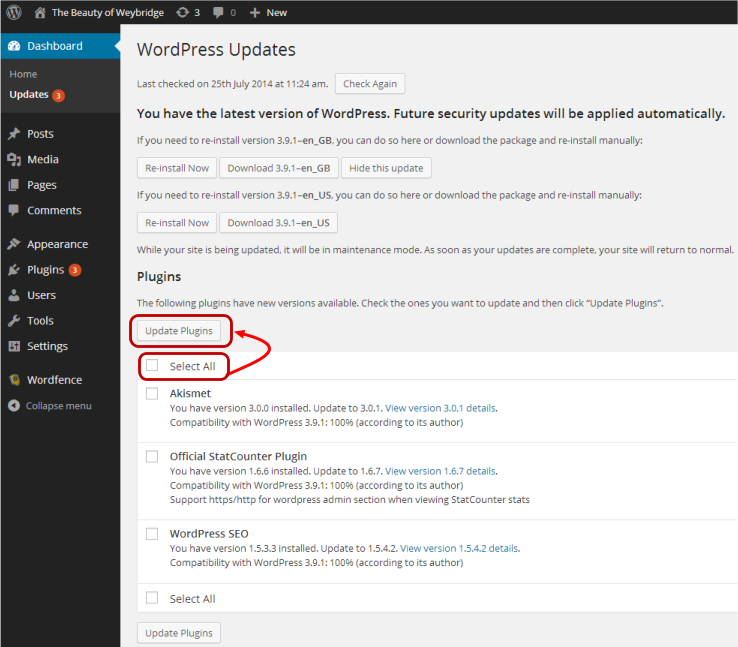
You’ll see the Updates page, and it’ll show that you have the latest version of WordPress, and then tell you how many plugins need to be updated. We’re just going to click the Select All button and then Update Plugins – that way, they all get updated at once. It’ll take about a minute:
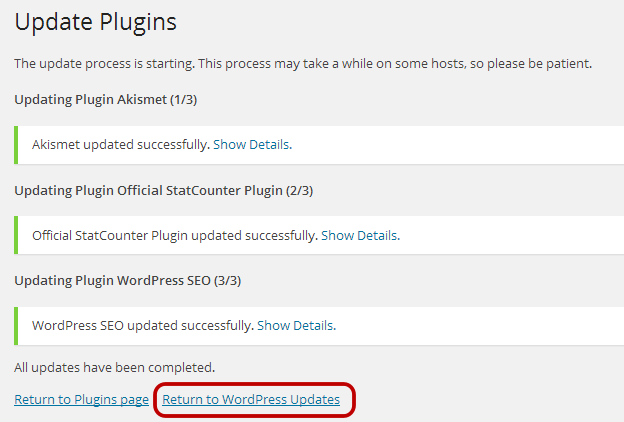
If all of the updates work OK, you’ll see a screen like this to confirm the fact. If not, you need to find out why – and update the plugin that didn’t work some other way – probably manually. These notes don’t cover that (and it’s unlikely to happen). Click the Return to WordPress Updates link at the bottom of the page:
On the WordPress Updates page, you should now see “Your plugins are all up-to-date”, so you can move on to checking your Themes. If your plugins aren’t all up-to-date, try updating them again: if that still doesn’t work, you may have to do one of them manually or ask for help – unlikely, though.
Now, the final part of Step 2, we’re going to update the Themes. Themes don’t get updated as often as WordPress itself or Plugins. Check your WordPress Updates page: if it now says “Your themes are all up-to-date”, you can trot on to Step 3.
If you see an update to your Theme though, you need to be REALLY CAREFUL when you update a Theme because if you have customised your theme and you didn’t so it ‘properly’ by creating a Child theme, when you update your theme you could bork your site by undoing your customisations. You made a backup so it’s not going to end the world if you don’t know if you used a customised non-child theme, but it’ll save you trouble later if you make sure.
Updating your Theme is possibly the same as updating your Plugins as above, but if you bought your Theme, it won’t update automatically and you’ll need to download the new version from the theme designer’s website just like you did when you bought it. Don’t just skip the Theme update because it sounds more trouble than it is worth – some themes use really really insecure code like TimThumb or Uploadify which can really cause a lot of damage: often the worst kind of hacks are done through insecure code like those two.